KeyCloak as IdP
Goal
Given you as a customer have your own Keycloak as well as DynamoAI’s Keycloak Deployed in your environment we want to enable you to allow your keycloak to act as an IdP for DynamoAI’s Keycloak Instance and thus enabling your own keycloak’s users to log in to DynamoAI’s Keycloak. For the Purpose of this Guide we will Refer to the 2 Keycloak as:
- Customer-Keycloak : This is your existing keycloak via which you manage your users.
- DynamoAI-Keycloak : This is the DynamoAI Application’s Keycloak which has been deployed into your environment.
Overall Approach
Given we have 2 Keycloak Instances with the naming convention decided above. We will be doing 2 major things:
- In the Customer-Keycloak Configuring a Client which will be used for authentication of Users registered in Customer-Keycloak.
- Using the Client configured in Customer-Keycloak to register an Keycloak OpenID Connect Identity Provider in DynamoAI-Keycloak
- Hence when Logging In to DynamoAI Application, the users of Customer-Keycloak can Opt to Log in via Registered IdP and don’t need to get registered separately on DynamoAI-Keycloak.
Tasks
Task-01 : Preparing Customer KeyCloak for Integration as an IdP
Pre-Requisites
- Redirect URI - This is the redirect url for the DynamoAI-Keycloak Instance Deployed in Customer’s Environment.
Steps
NOTE: All the Below Steps will be performed in the Customer-Keycloak-
Access Keycloak Admin Console
-
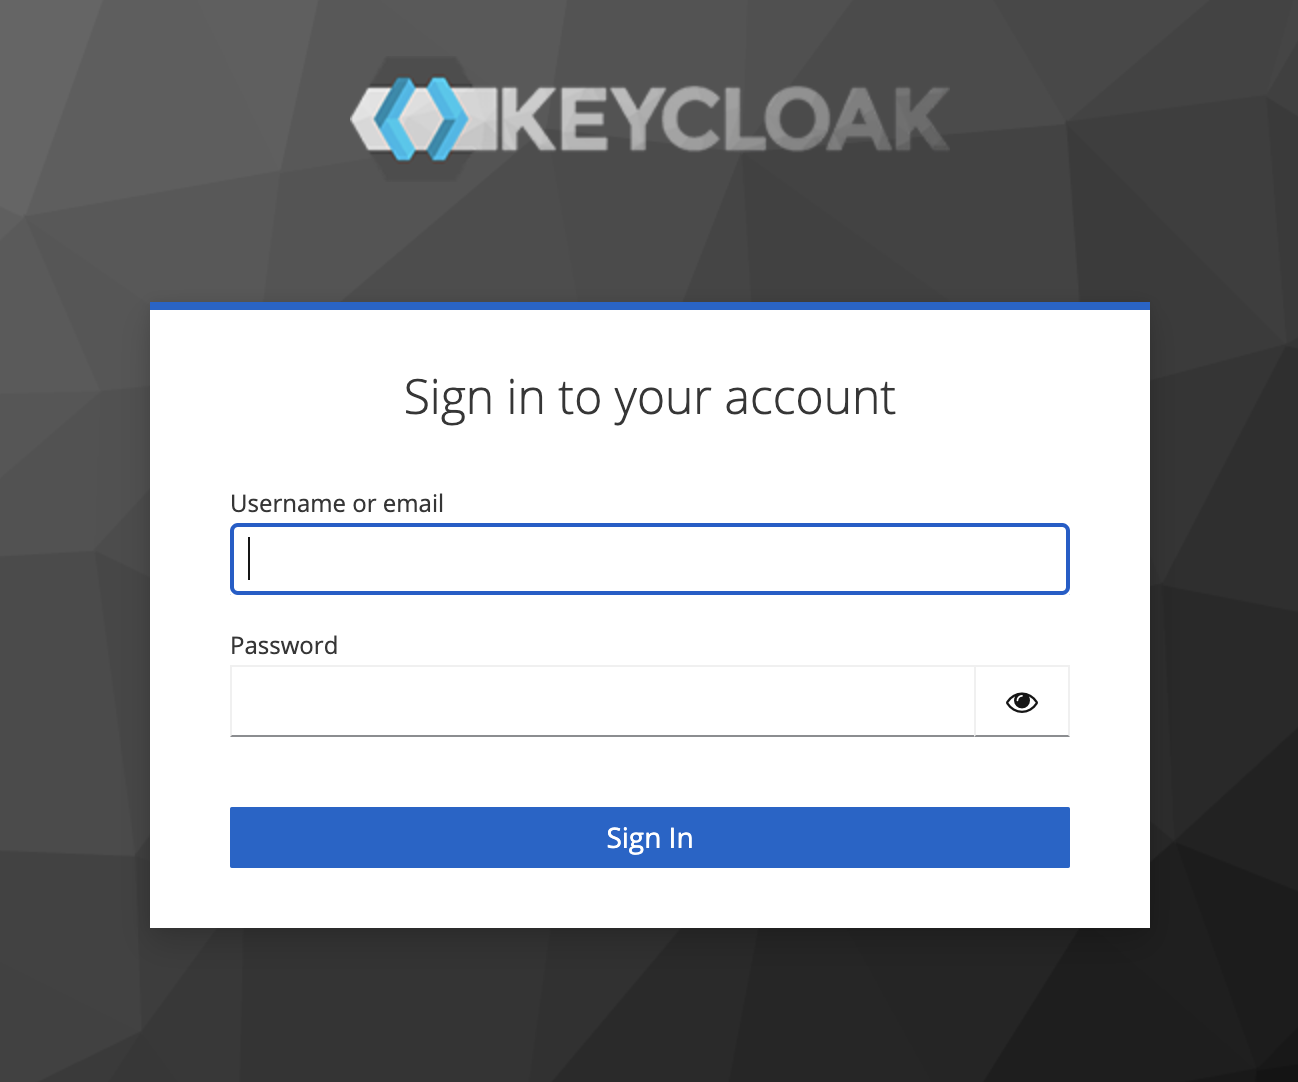
Open the Customer-Keycloak Admin Console in a web browser.
-
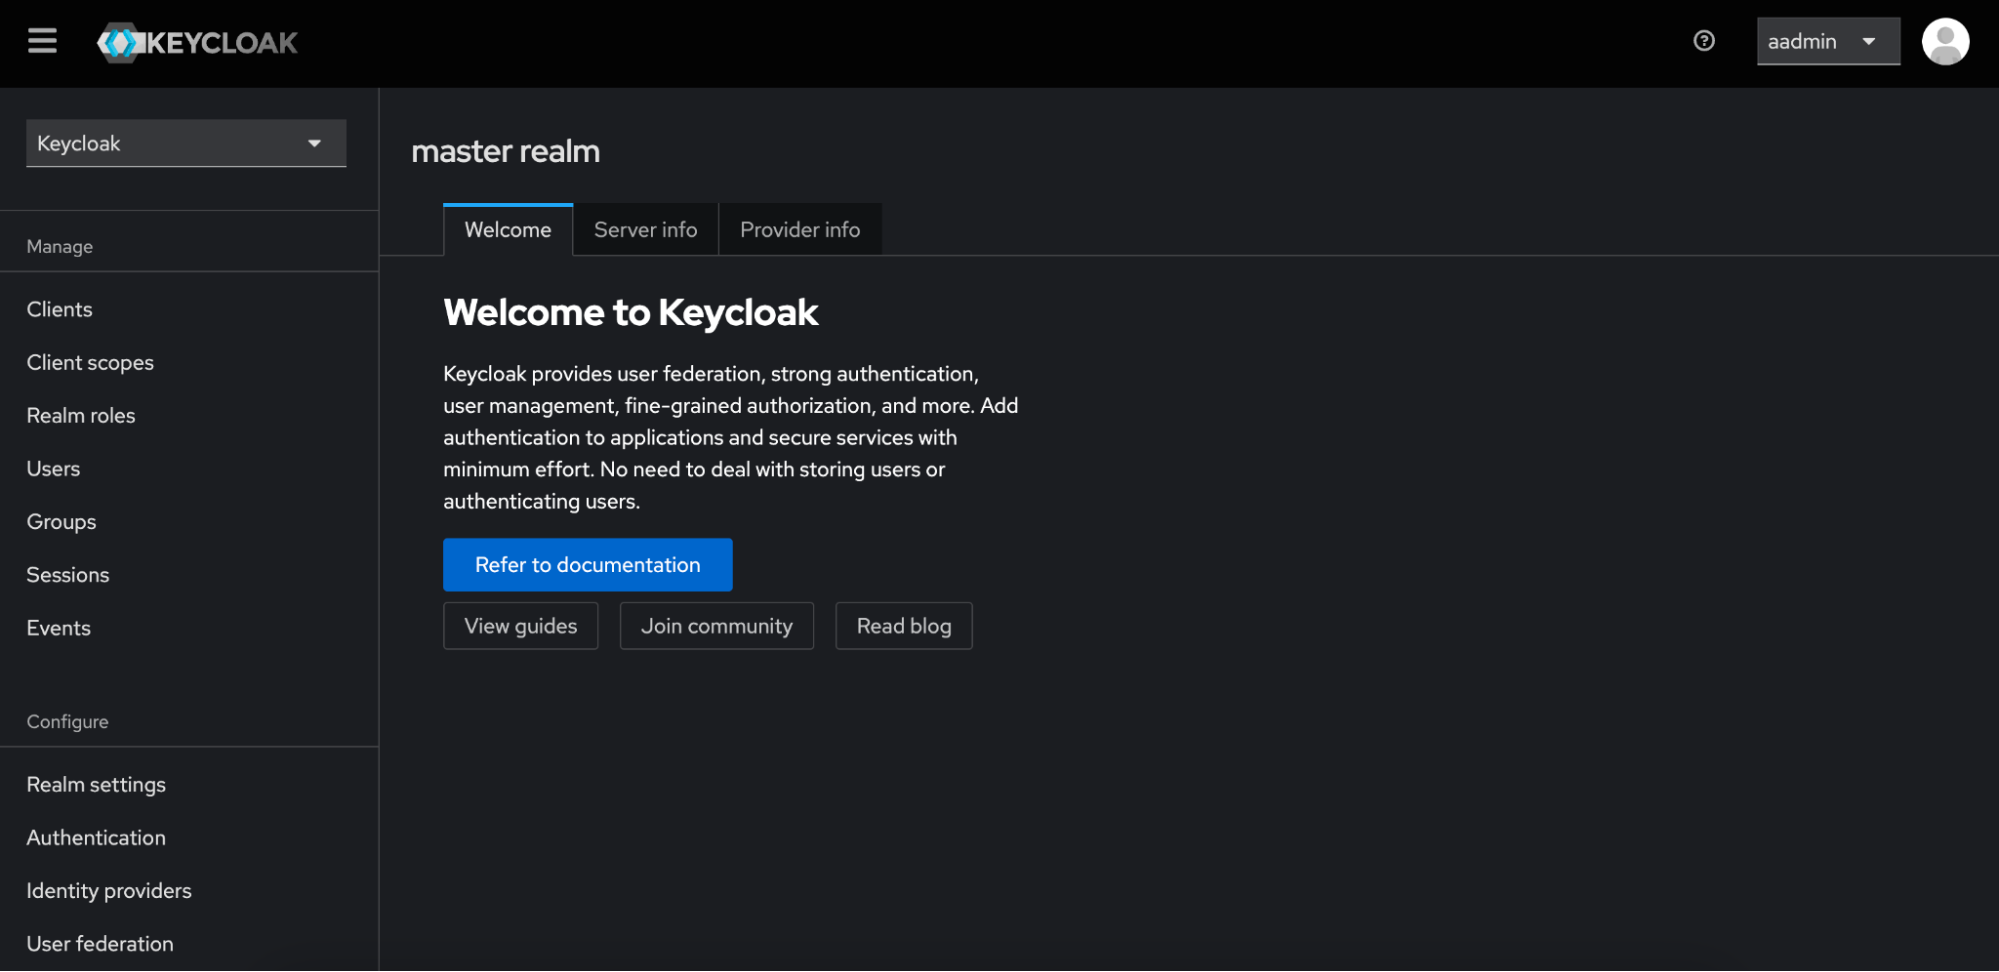
Log in using your admin credentials to land up on management page.
-
-
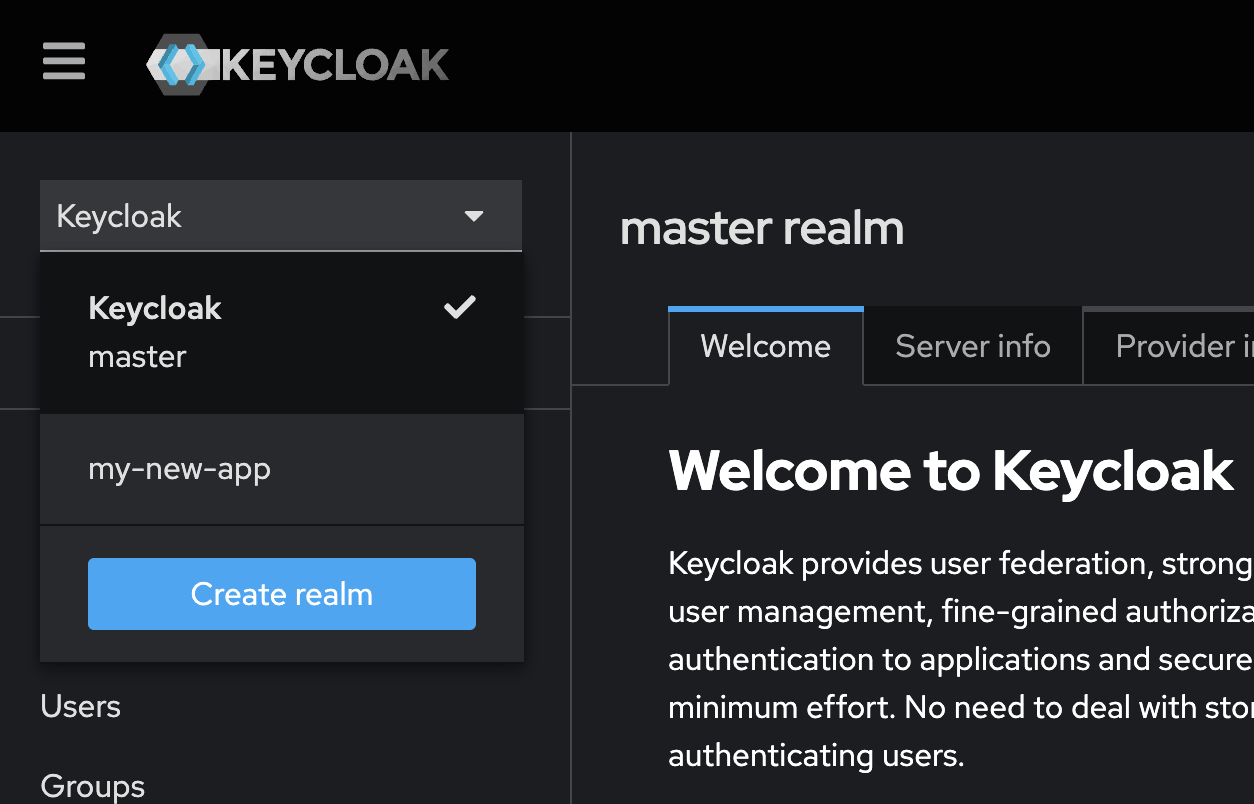
Select a Realm
Select your realm via which you manage your users.
-
Create a Client to later use as IdP in DynamoAI-Keycloak.
Clients are entities that Keycloak protects. Here we create a client in the Customer-Keycloak in the realm where they have the users they want to give access to their DynamoAI Deployment
-
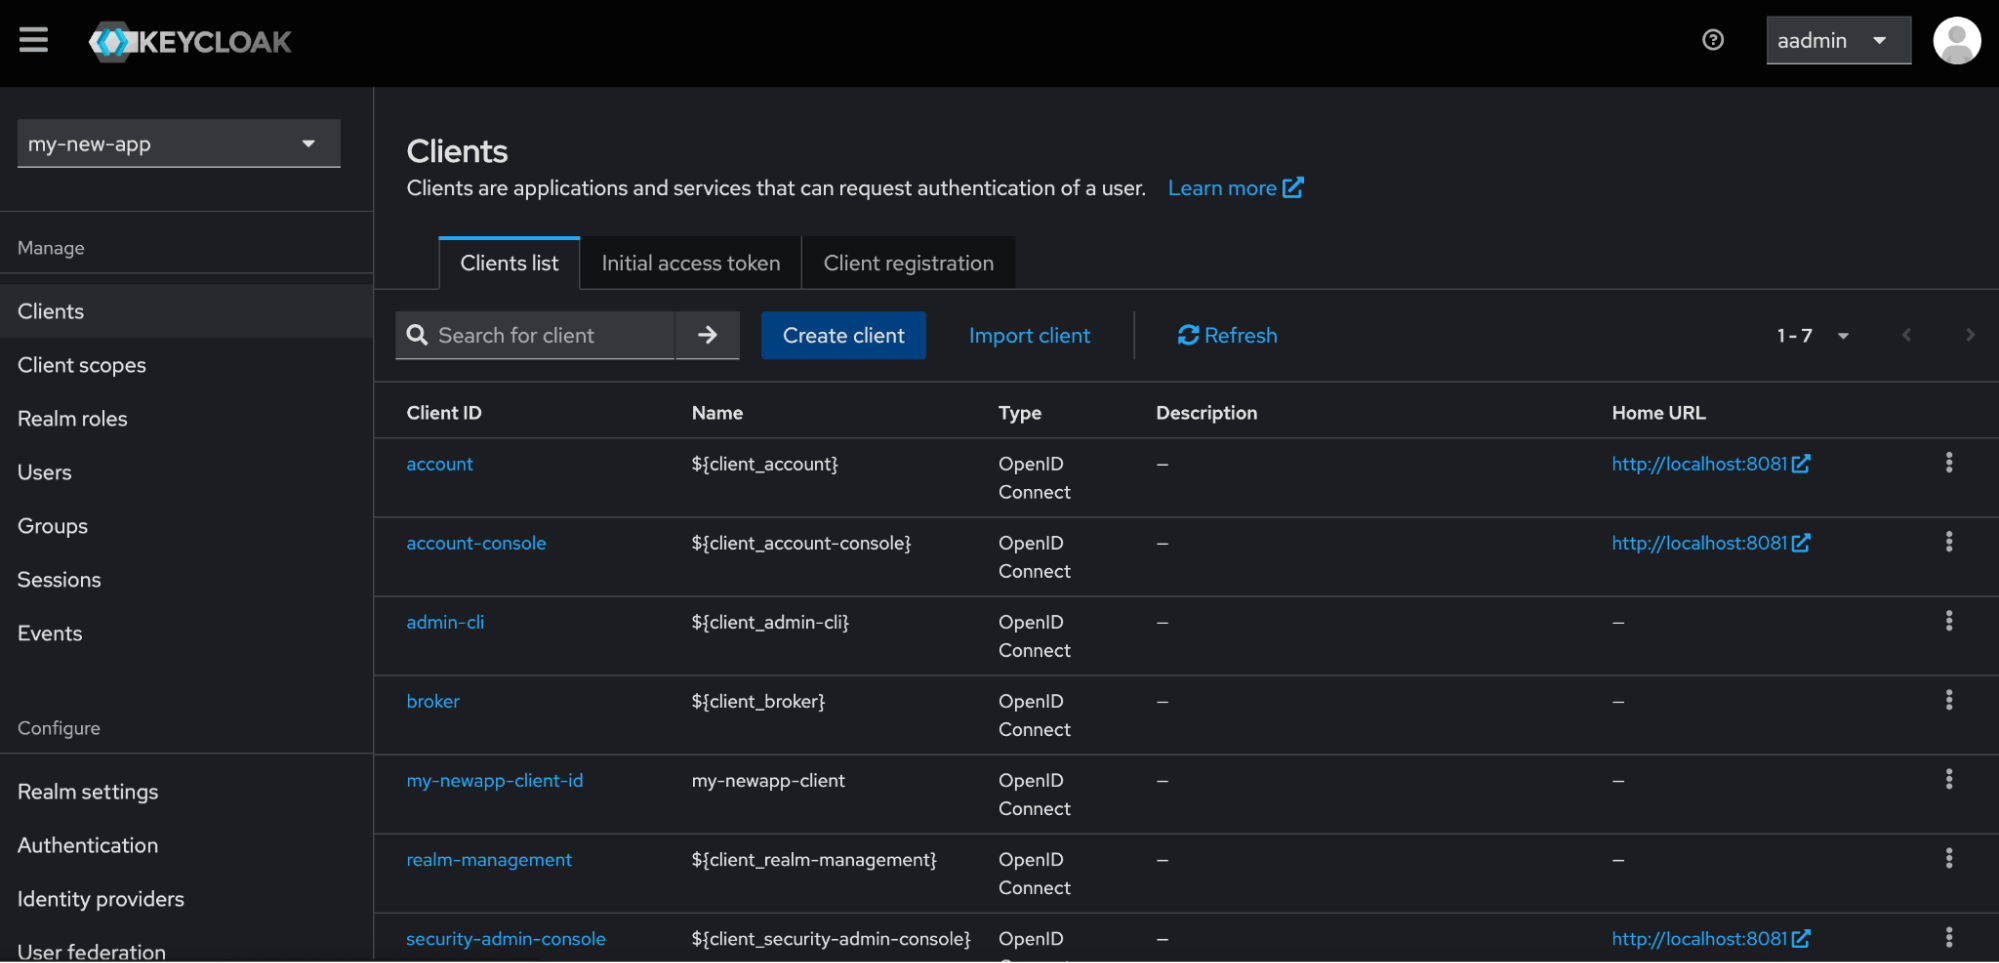
Go to Clients in the left-hand menu.
-
Click on Create.
-
Select OpenID Connect as the Client Protocol.
-
In the Client ID field, enter a unique identifier (for example, `myapp-client`).

-
Enable Client Authentication and check auth flows.
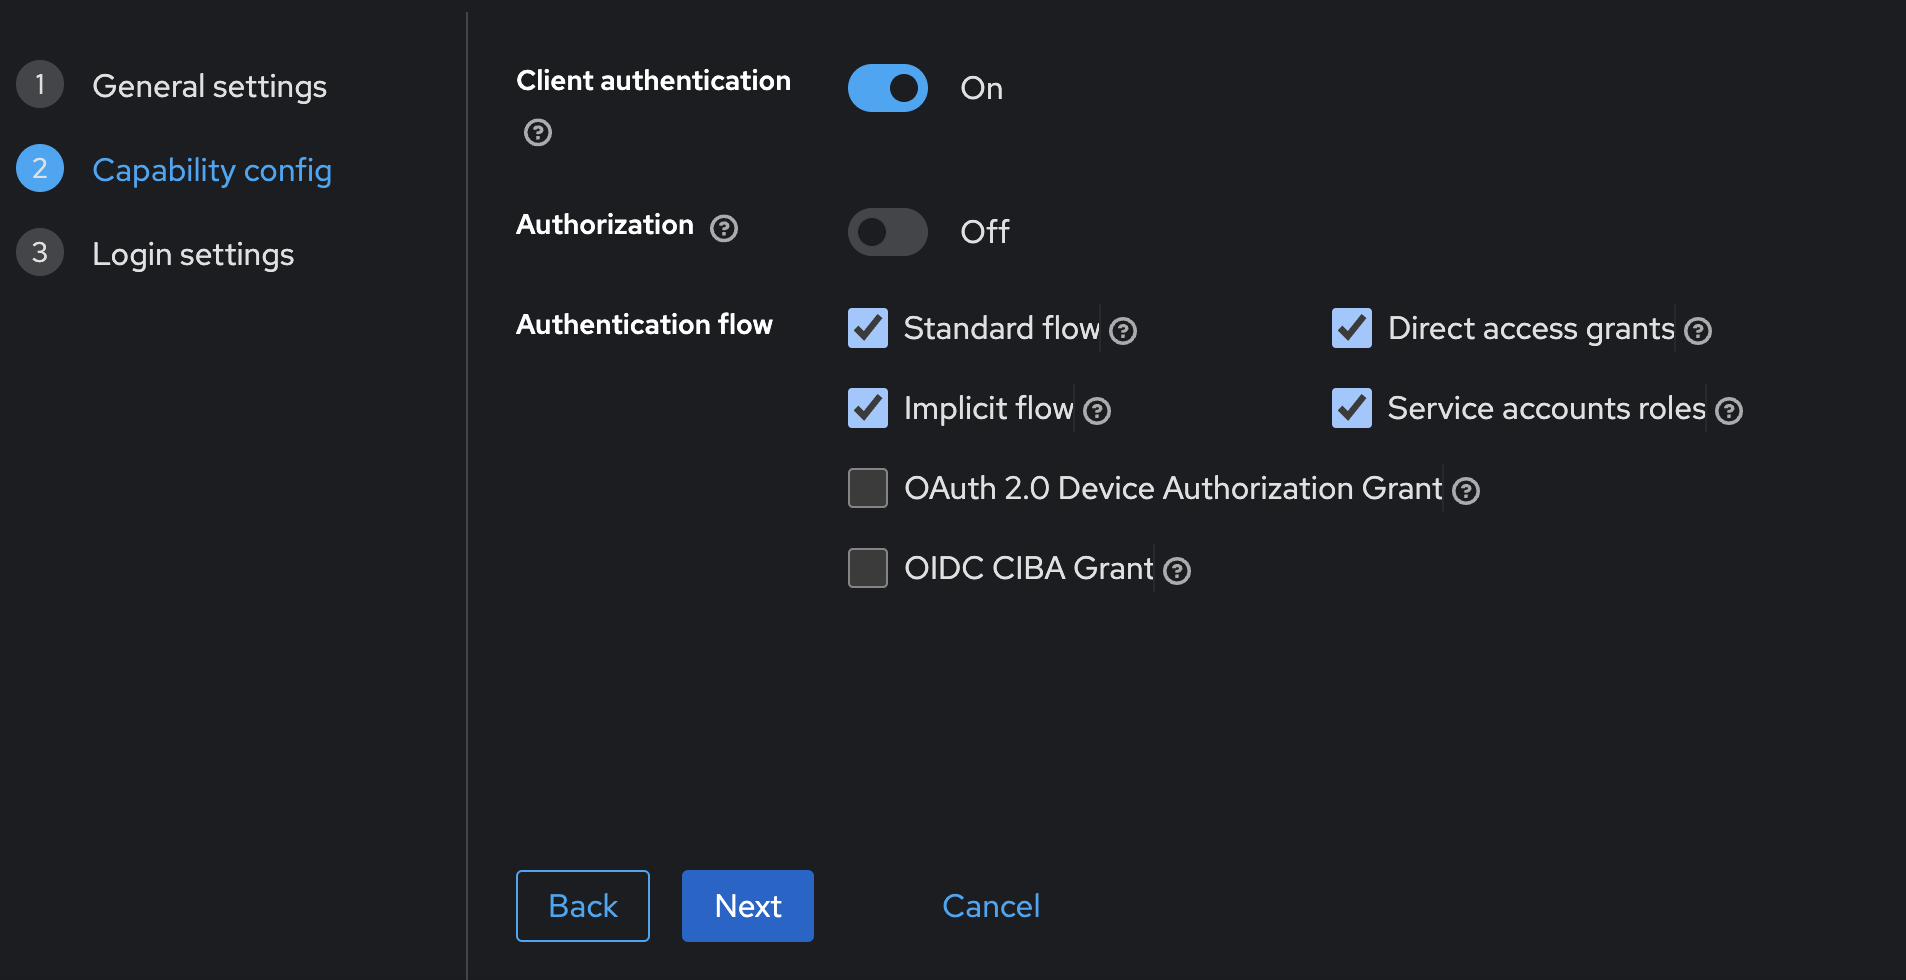
-
Add the redirect URI from DynamoAI-Keycloak found here.
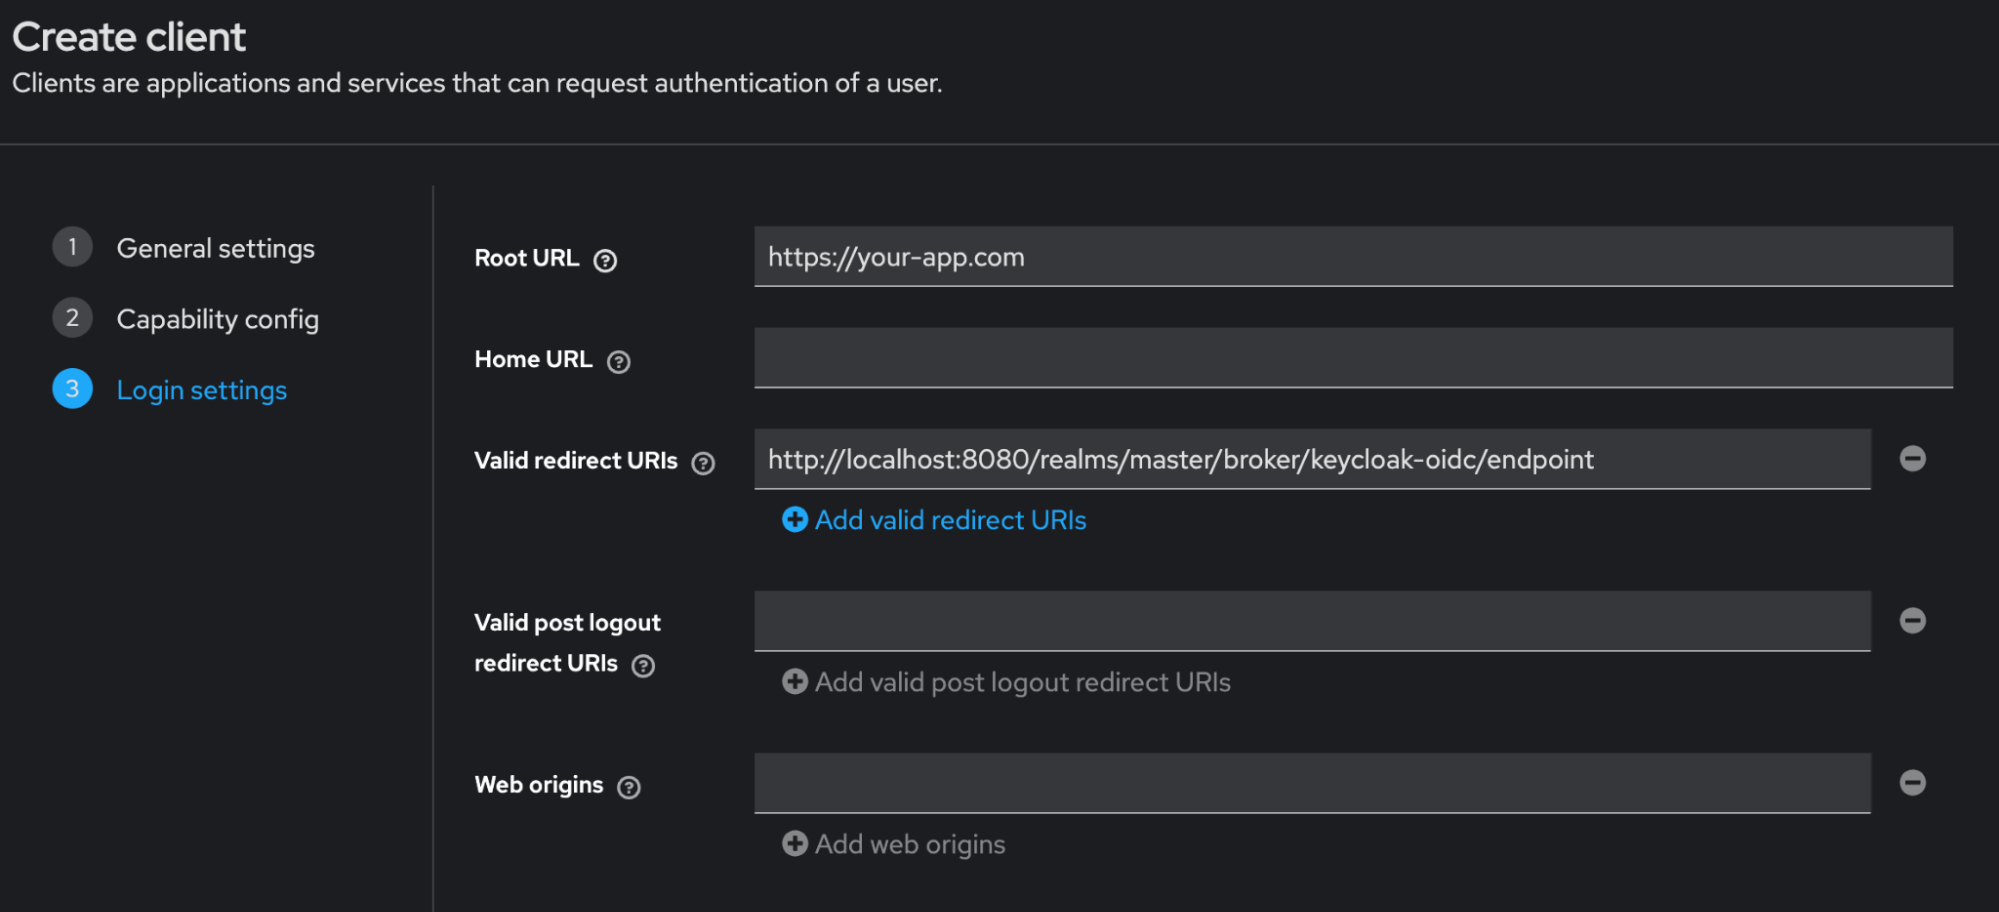
-
Click Save.
-
-
Configure Client Settings
After saving the client, configure the following fields:
-
Visit Credentials tab and set client authenticator to
signed jwt with client secret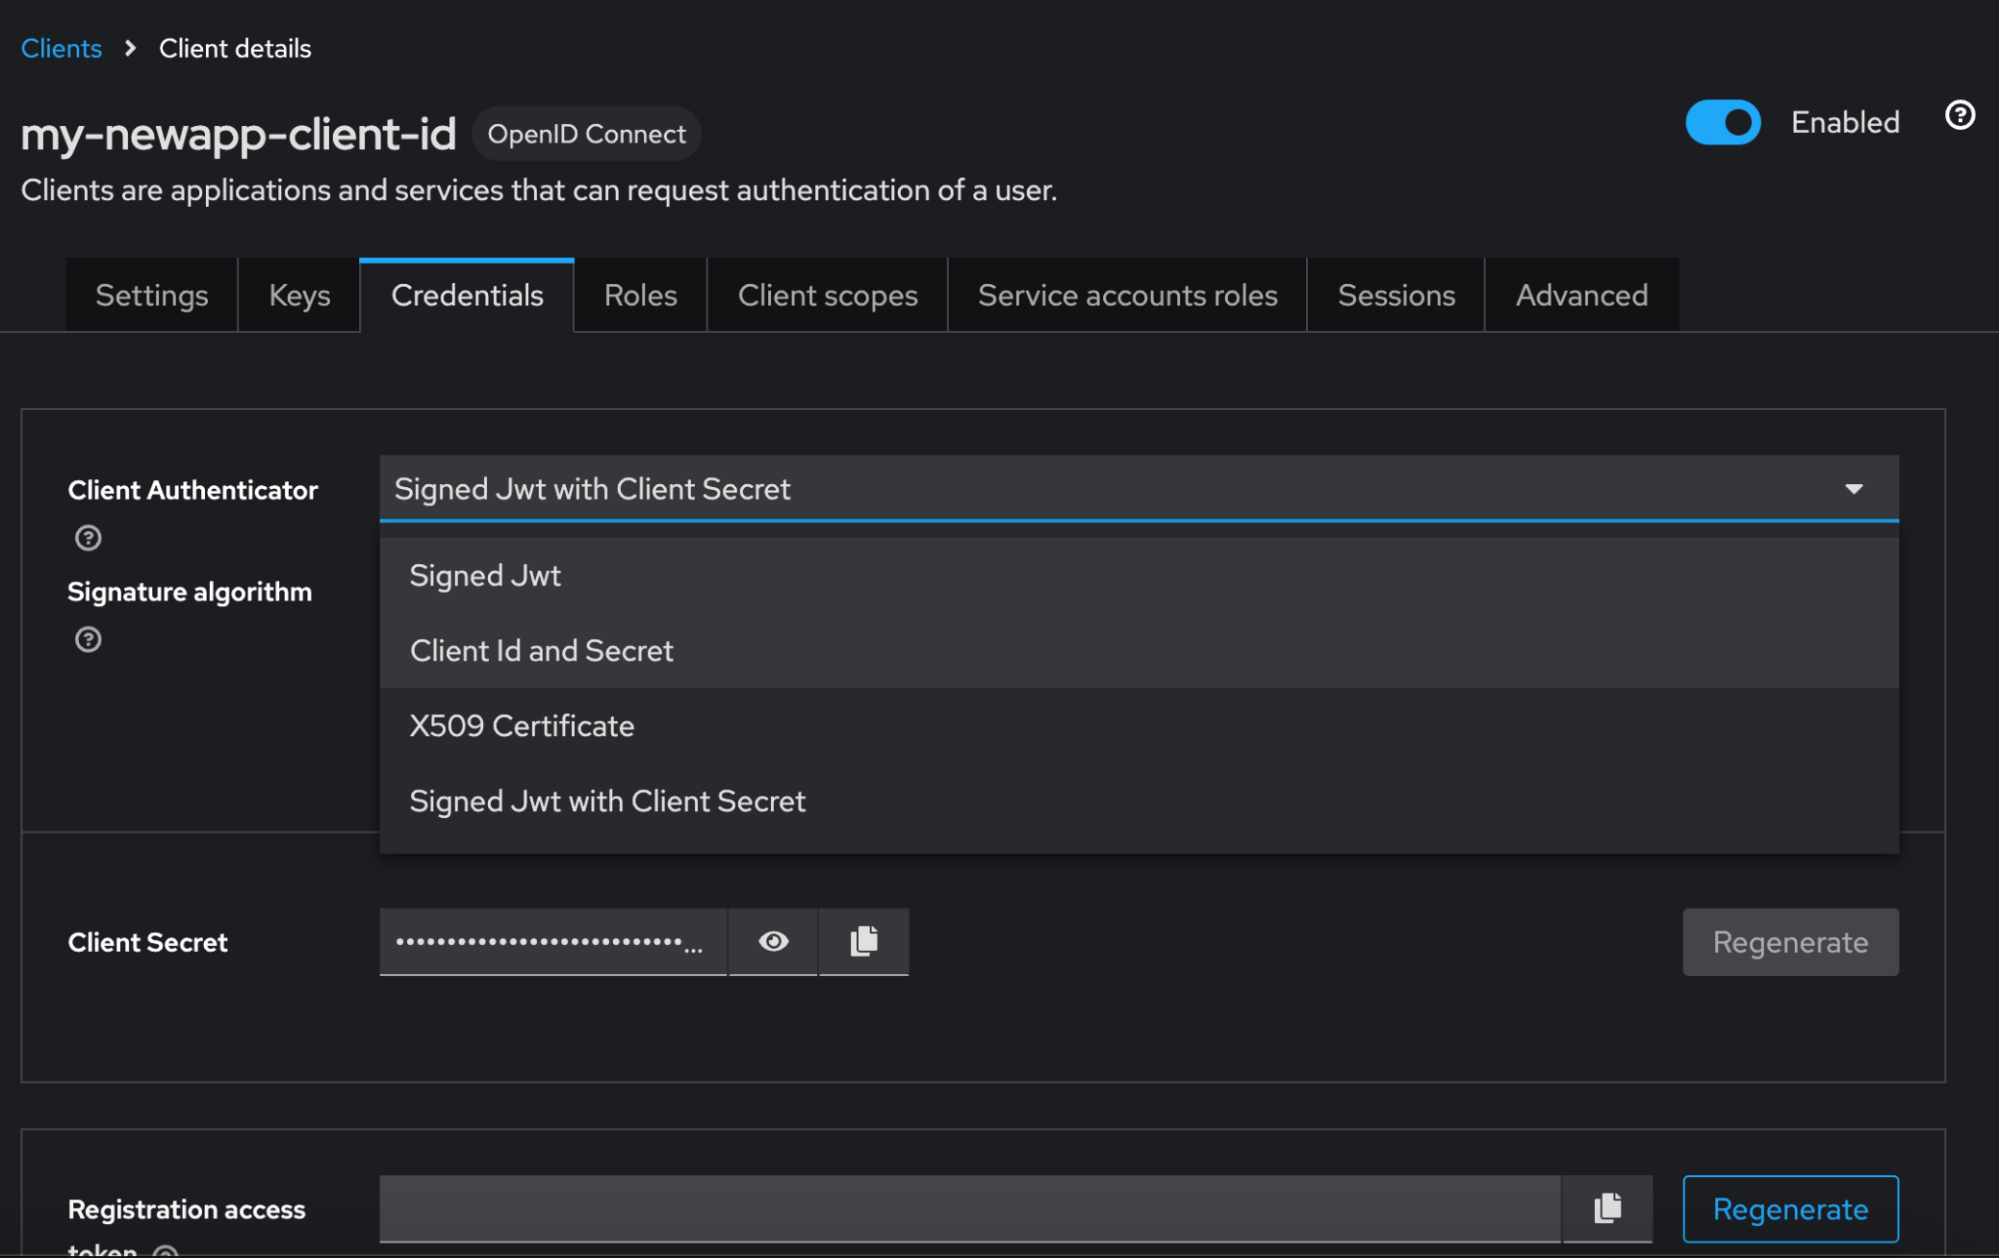
-
Set Signing Algorithm to HS256
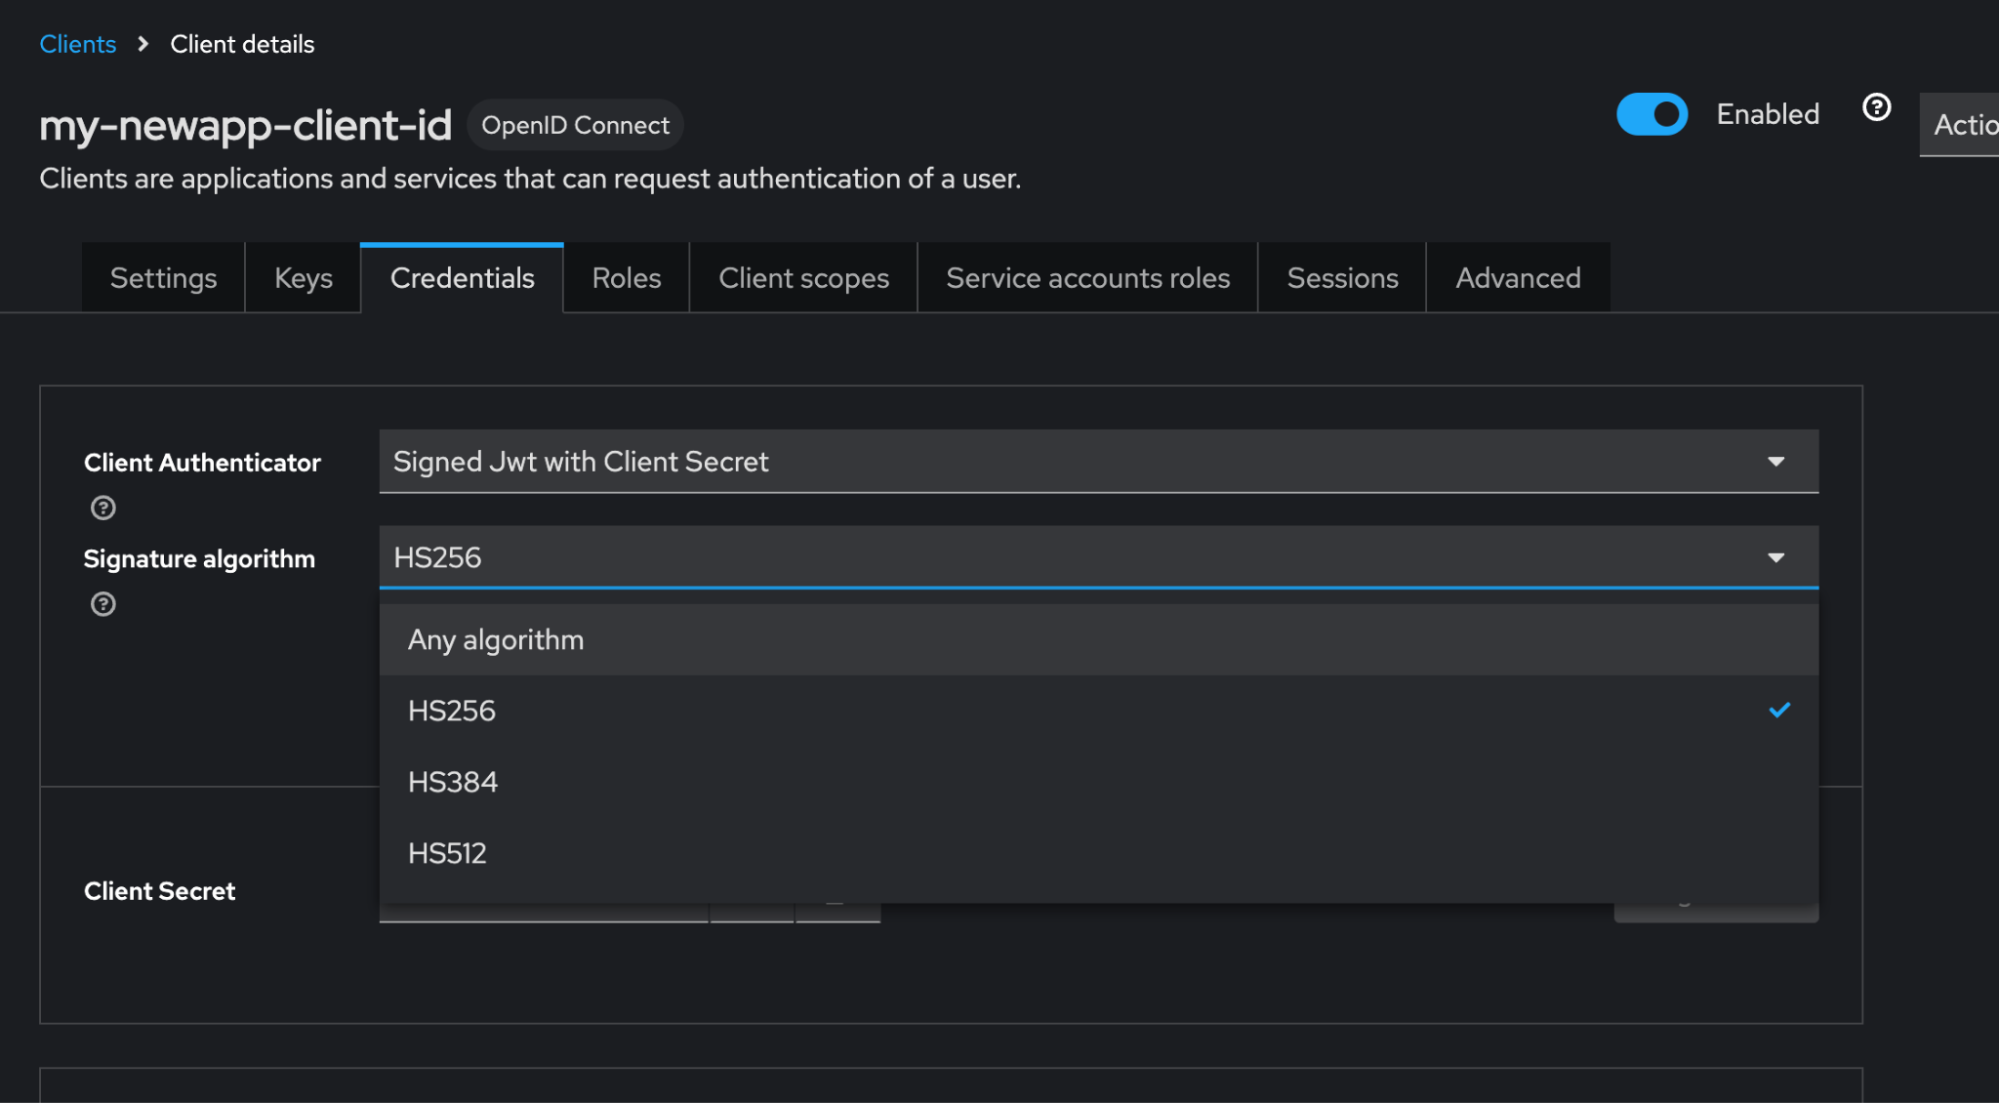
-
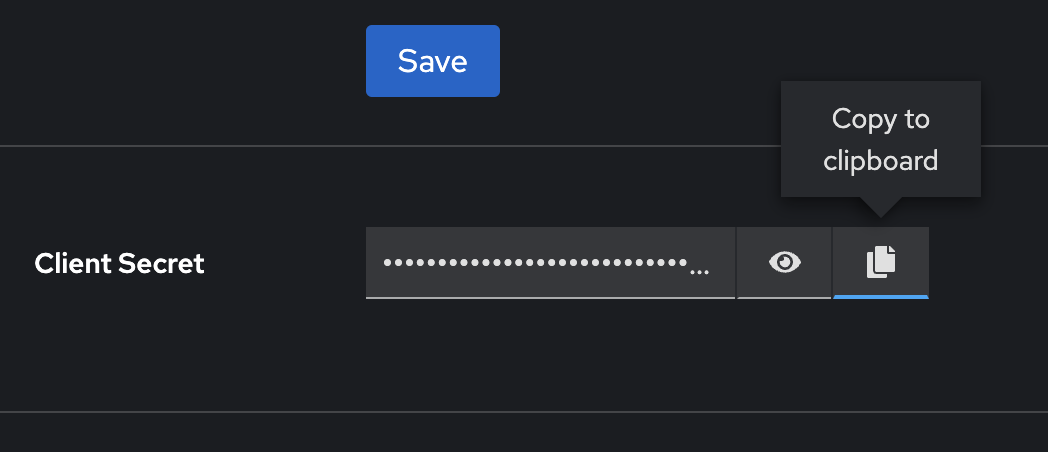
Click Save and copy the Client Secret and store it.
-
-
Get URLs from Customer-Keycloak Instance
-
Visit your realm’s settings page and click on OpenID Endpoint Configuration.
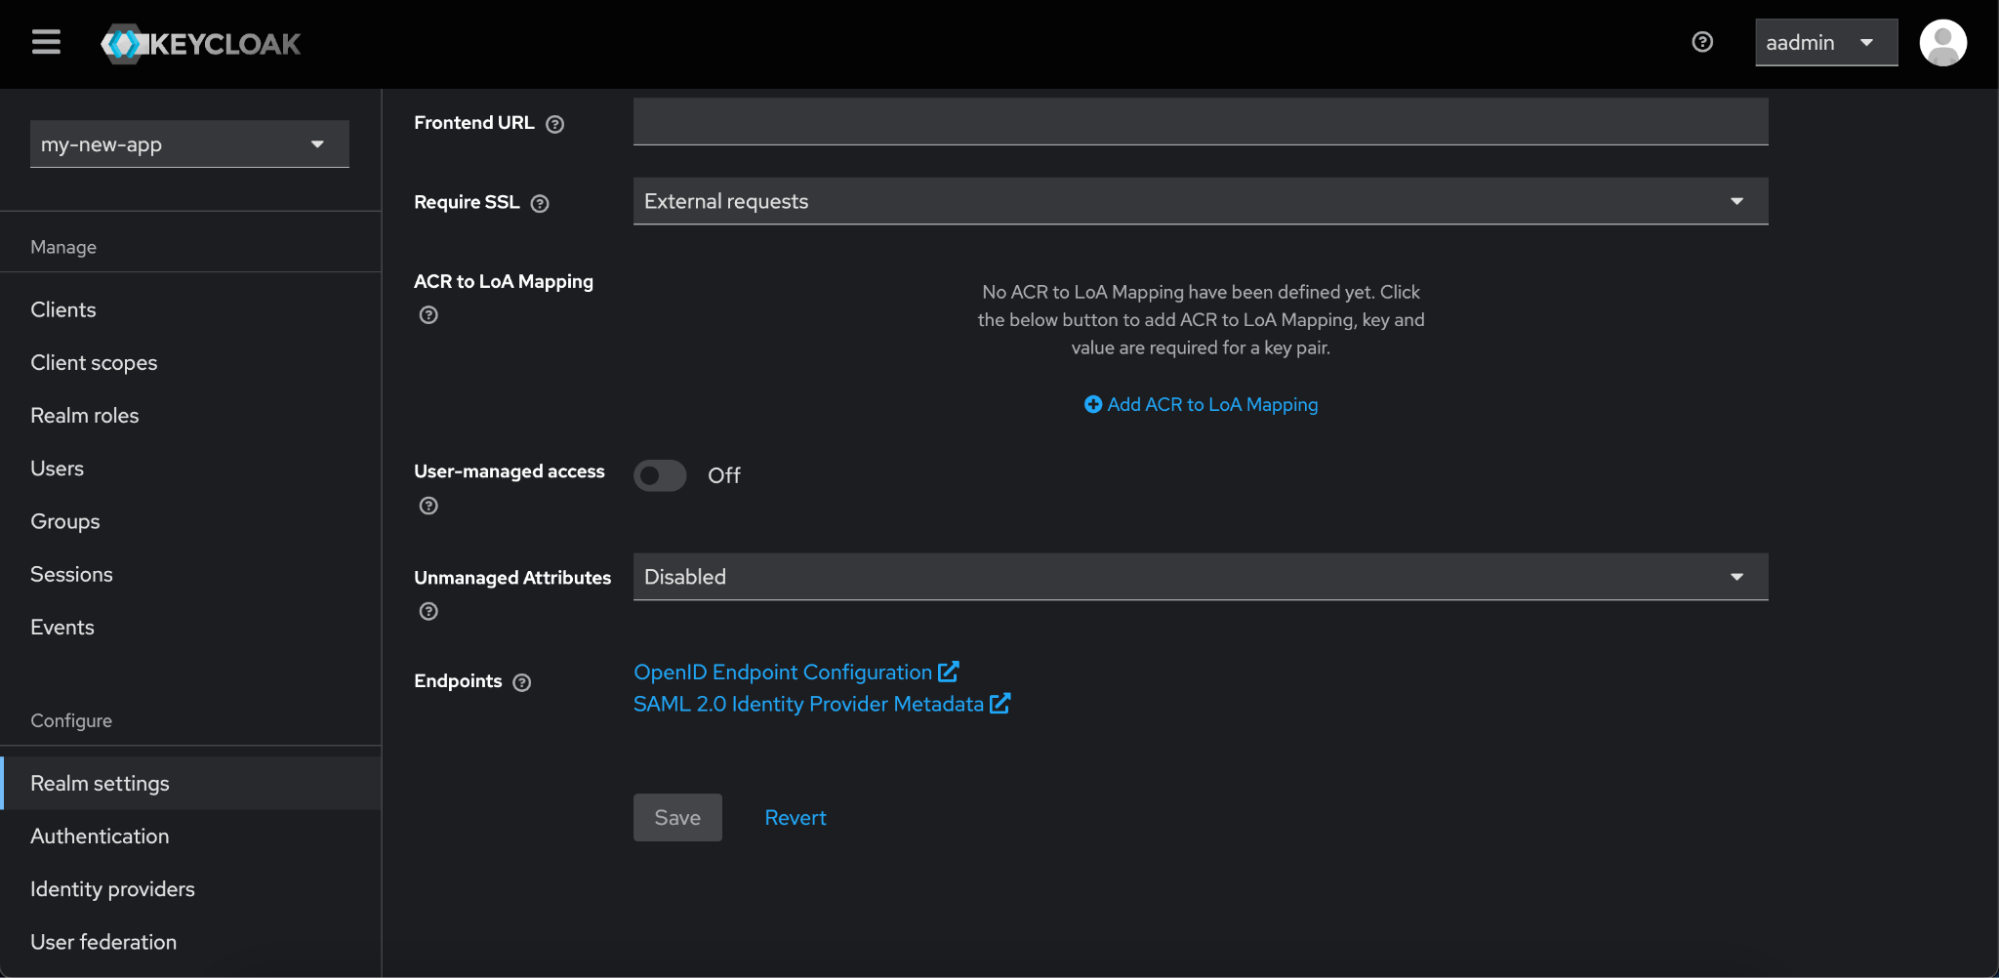
-
It should take you to a page like this
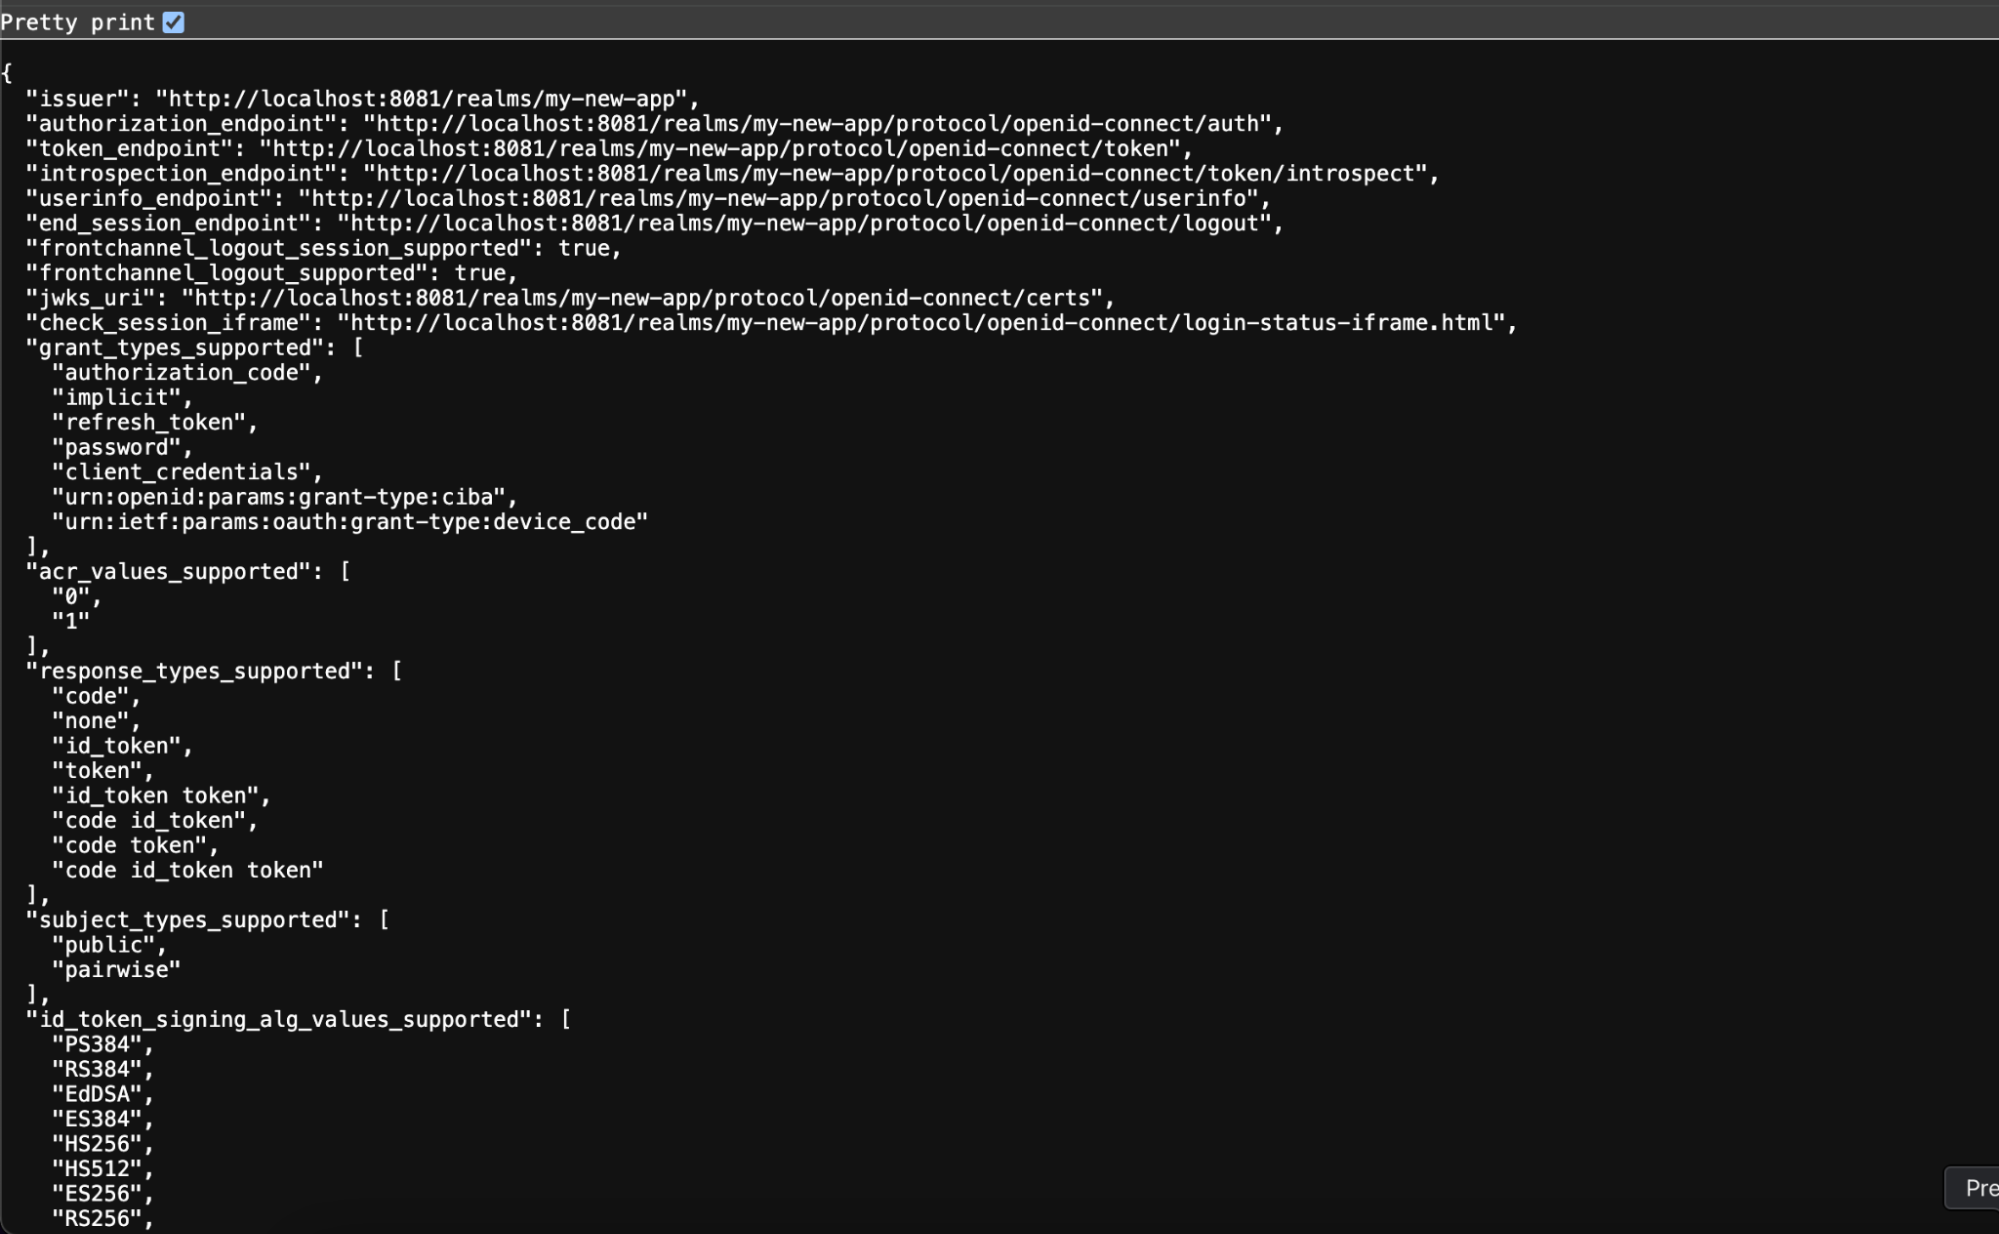
-
Key URLs
From above realm settings page, Keep the Below URLs handy for the next step.
-
Issuer URL:
https://<customer-keycloak-domain>/realms/<realm-name> -
JWKS URL:
https://<customer-keycloak-domain>/realms/<realm-name>/protocol/openid-connect/certs -
Client ID:
The client ID used to register their application in Keycloak. -
Client Secret (if applicable):
Only for confidential clients. -
Authorization URL:
The URL to initiate login. -
Token URL:
The URL where tokens are issued. -
Logout URL (optional):
https://<customer-keycloak-domain>/realms/<realm-name>/protocol/openid-connect/logout
Task-2 : Integrating Customer KeyCloak in DynamoAI Application
Steps
NOTE: All the Below Steps will be performed in the DynamoAI-Keycloak-
Access DynamoAI Keycloak
Visit DynamoAI-Keycloak Dashboard and Login
-
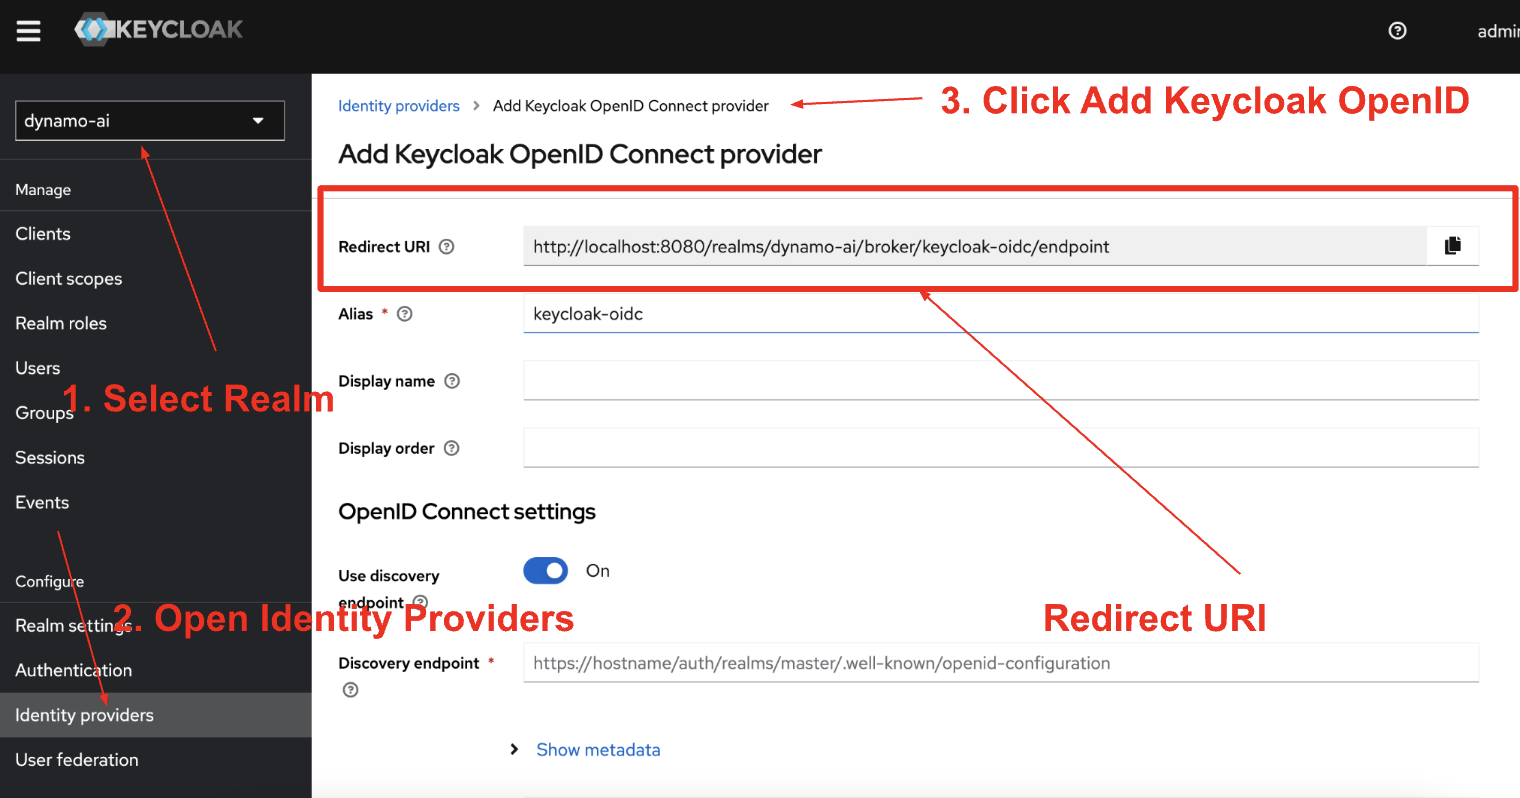
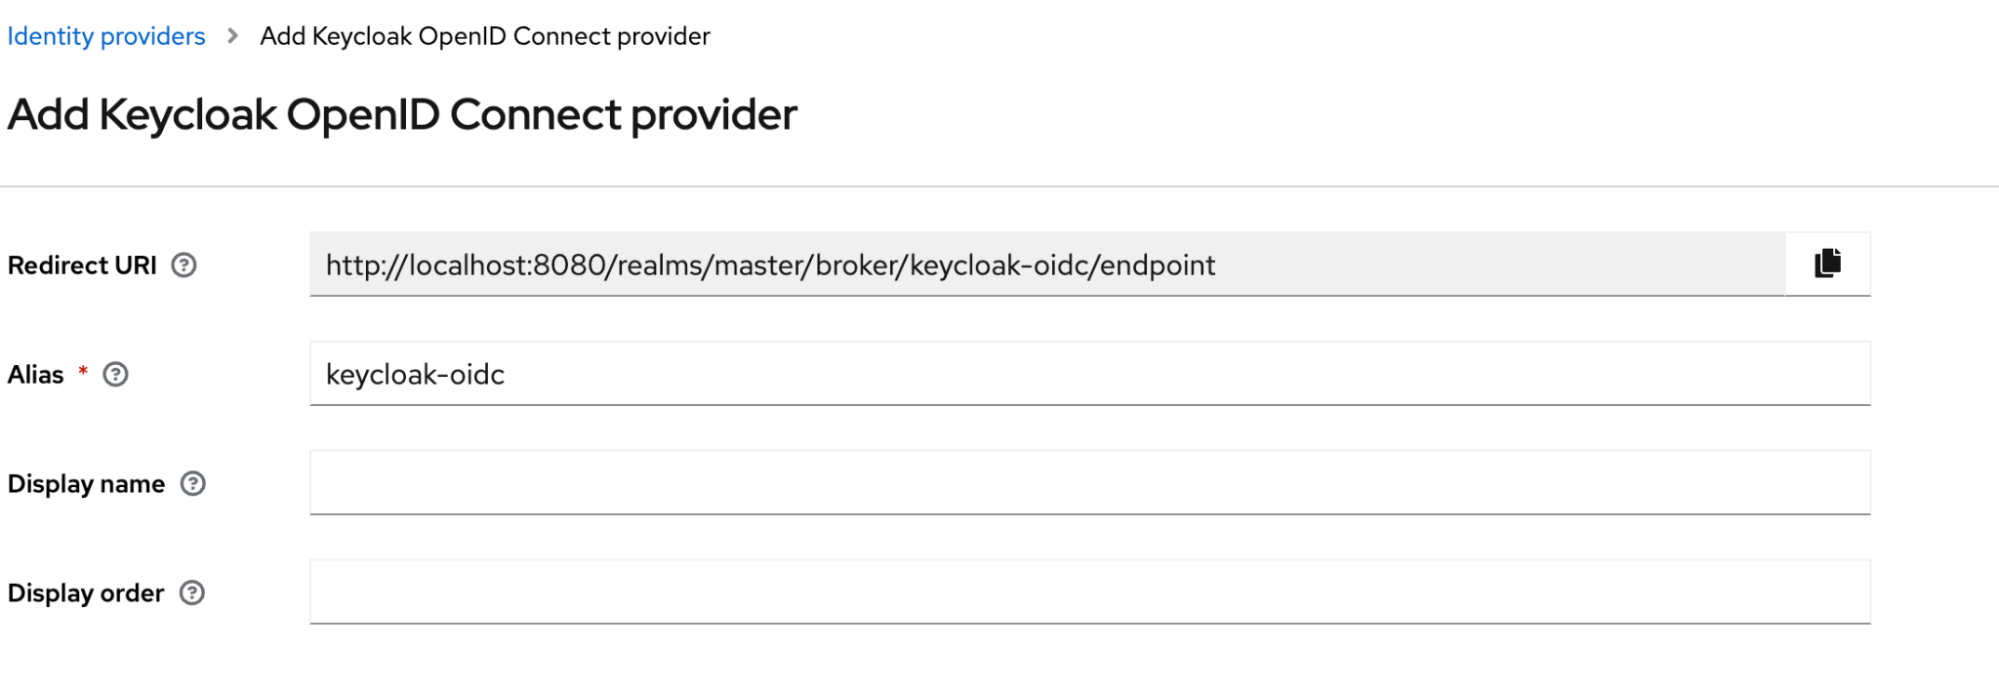
Add Identity Provider
- Visit Identity Providers section and click Add provider and select Keycloak OpenID Connect.
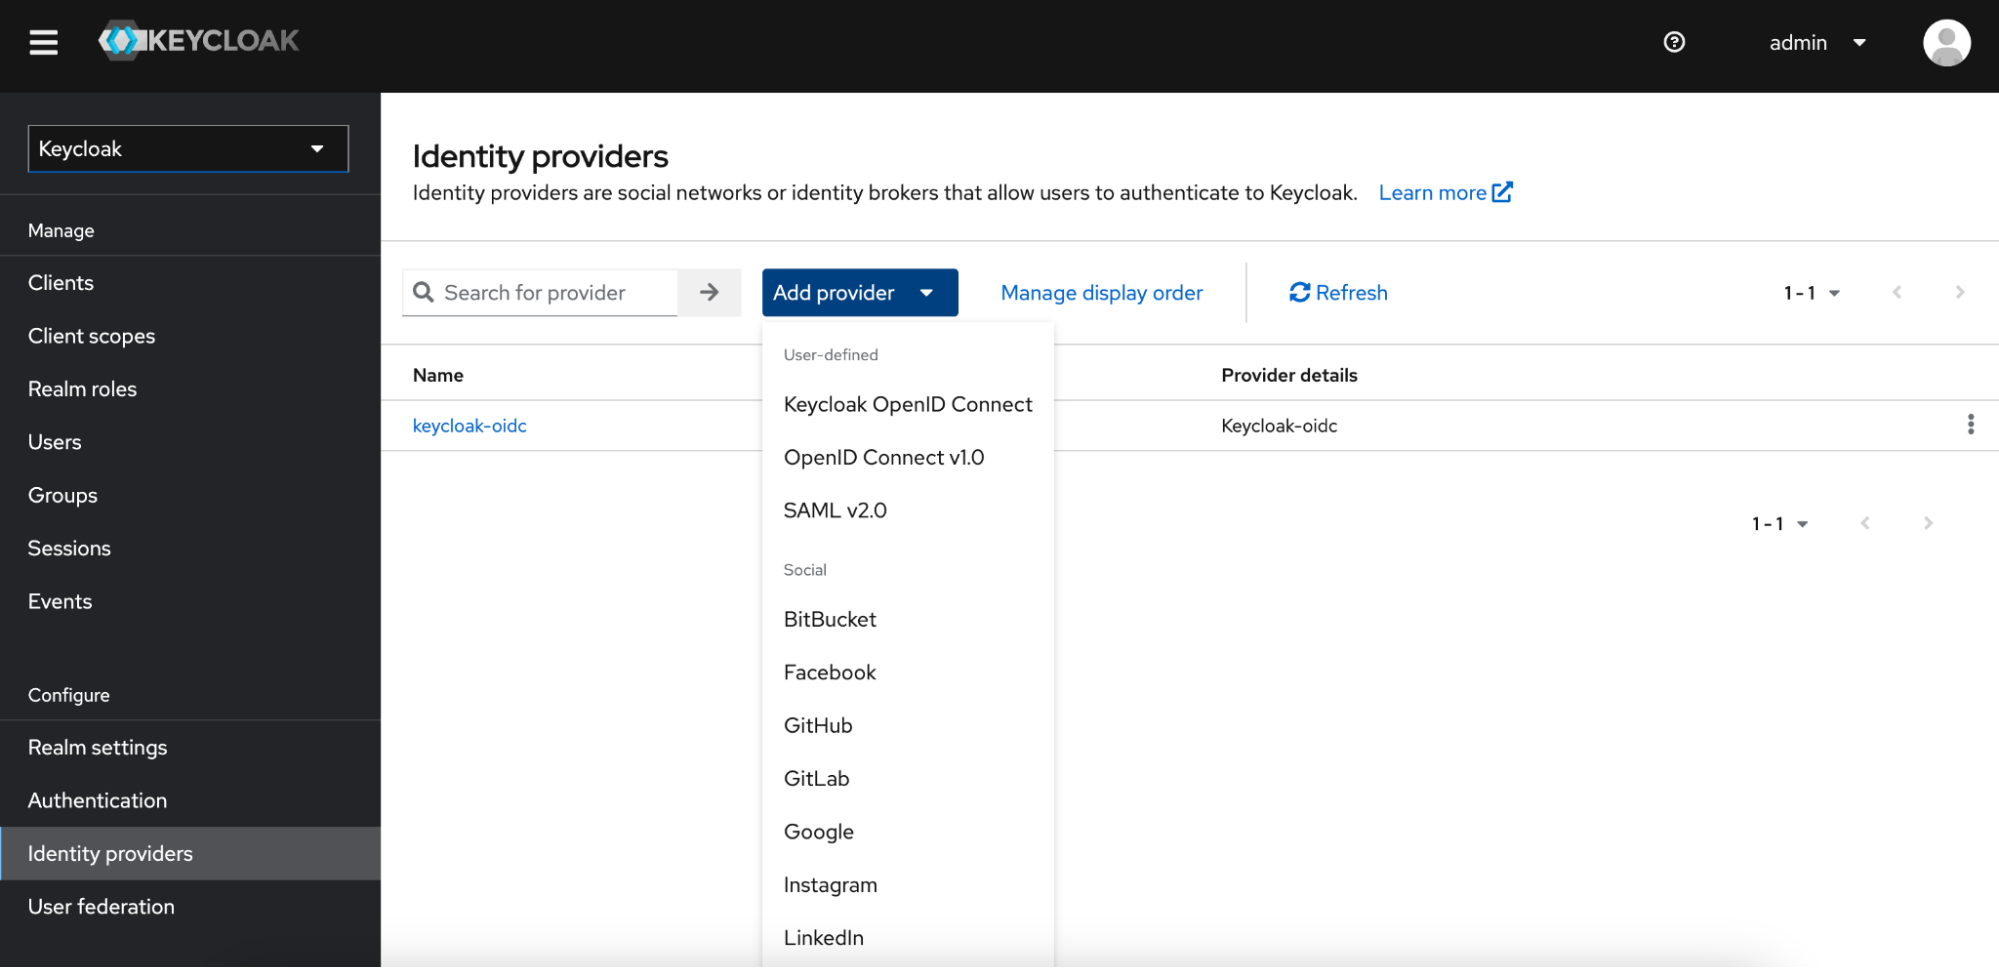
- Ensure this redirect Uri is the same one used in client on customer-keycloak here
-
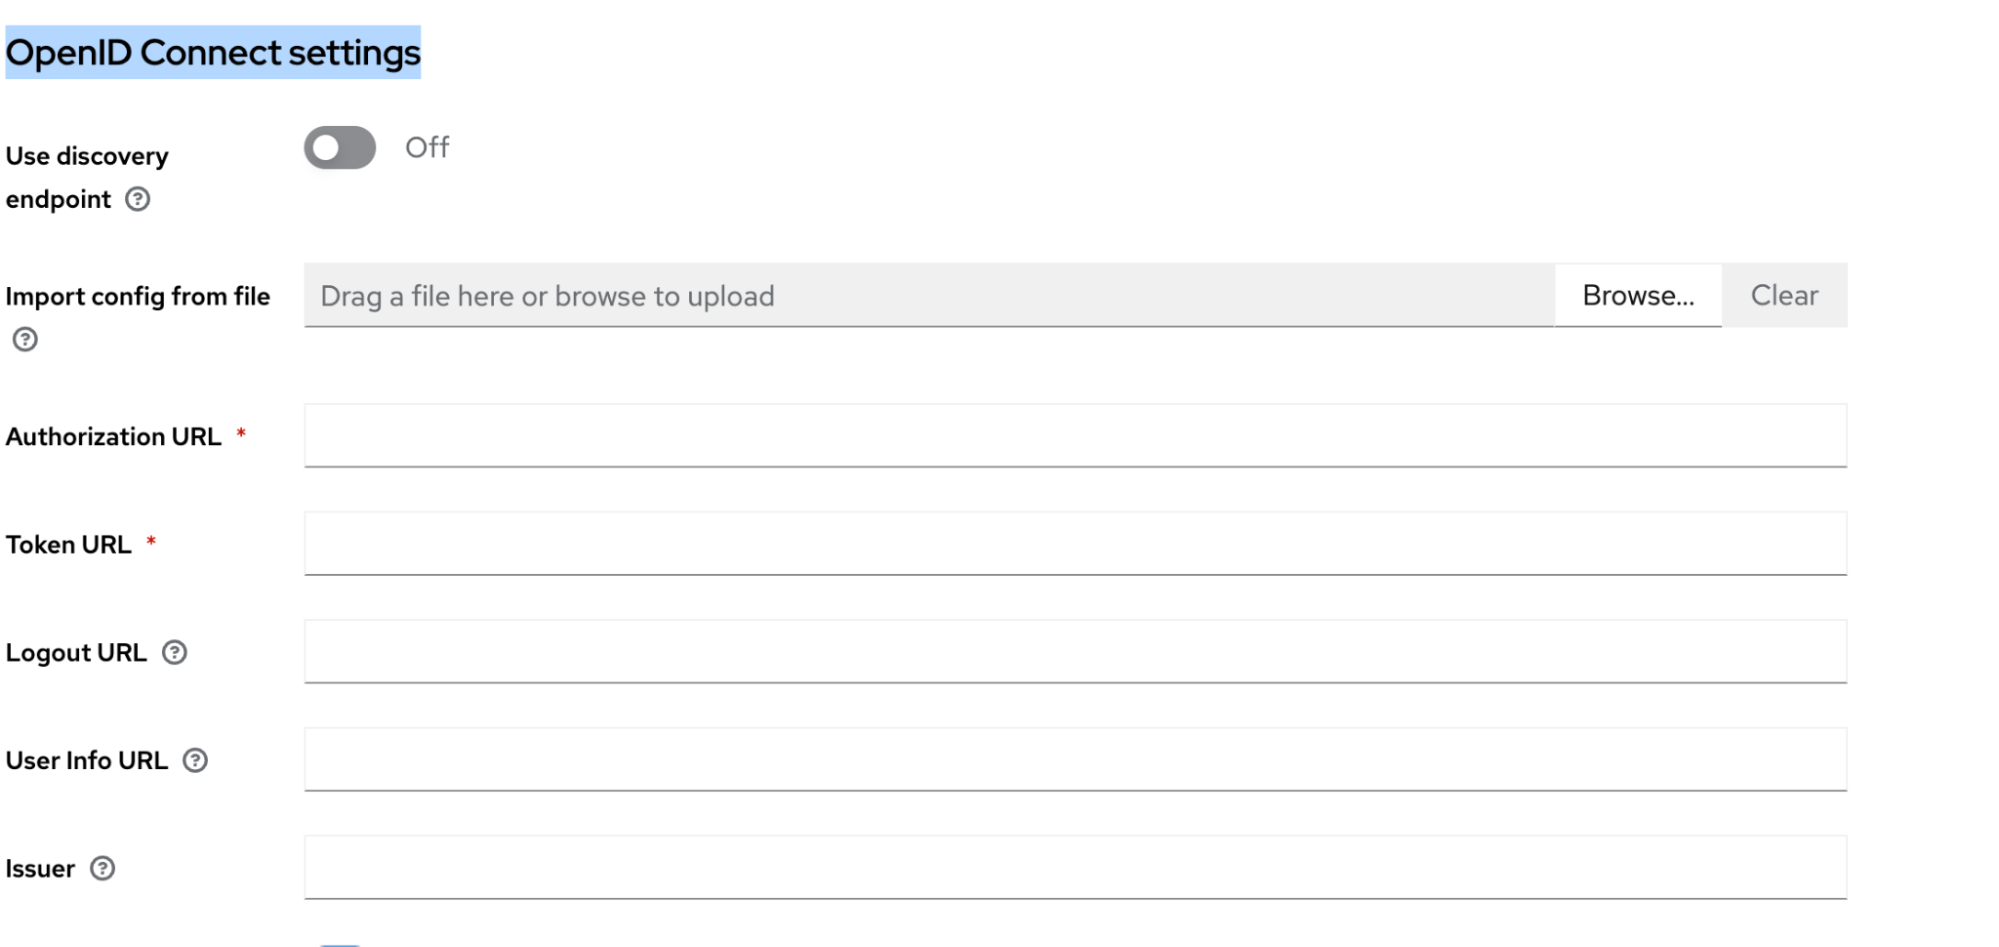
Configure IdP
- In OpenID Connect Settings fill in all URLs
-
Enable validate signatures, check use JWKS url, fill in the JWKS Endpoint from customer.
-
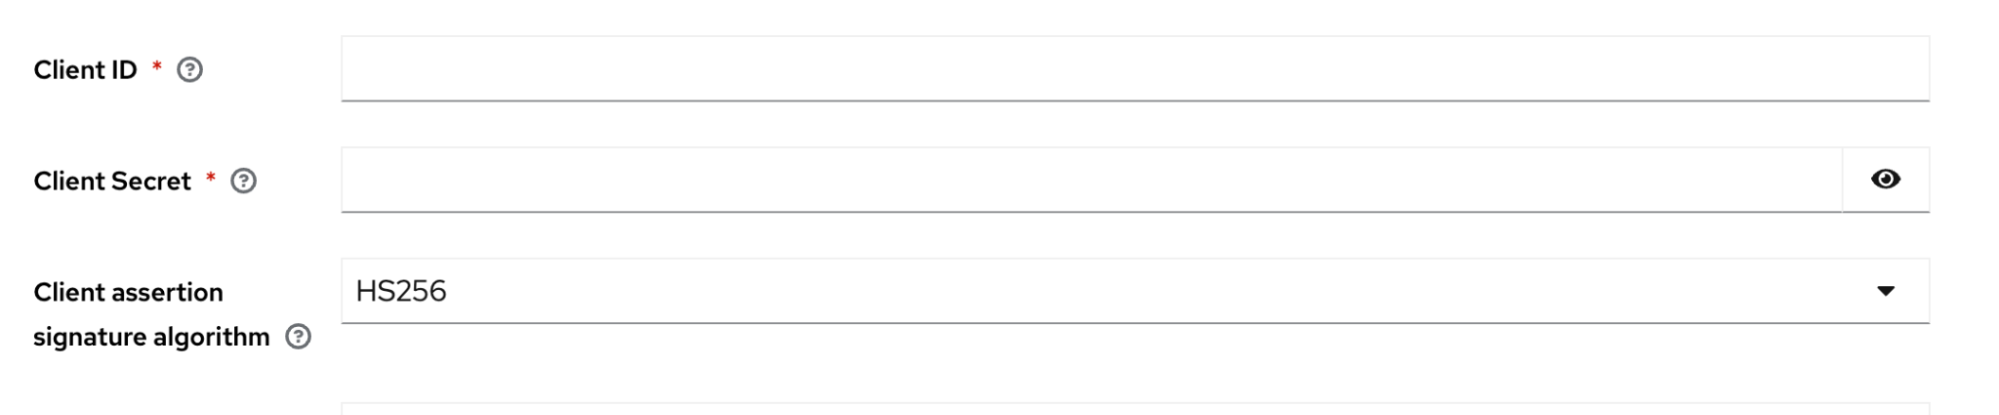
In client authentication select
JWT Signed with Client Secret
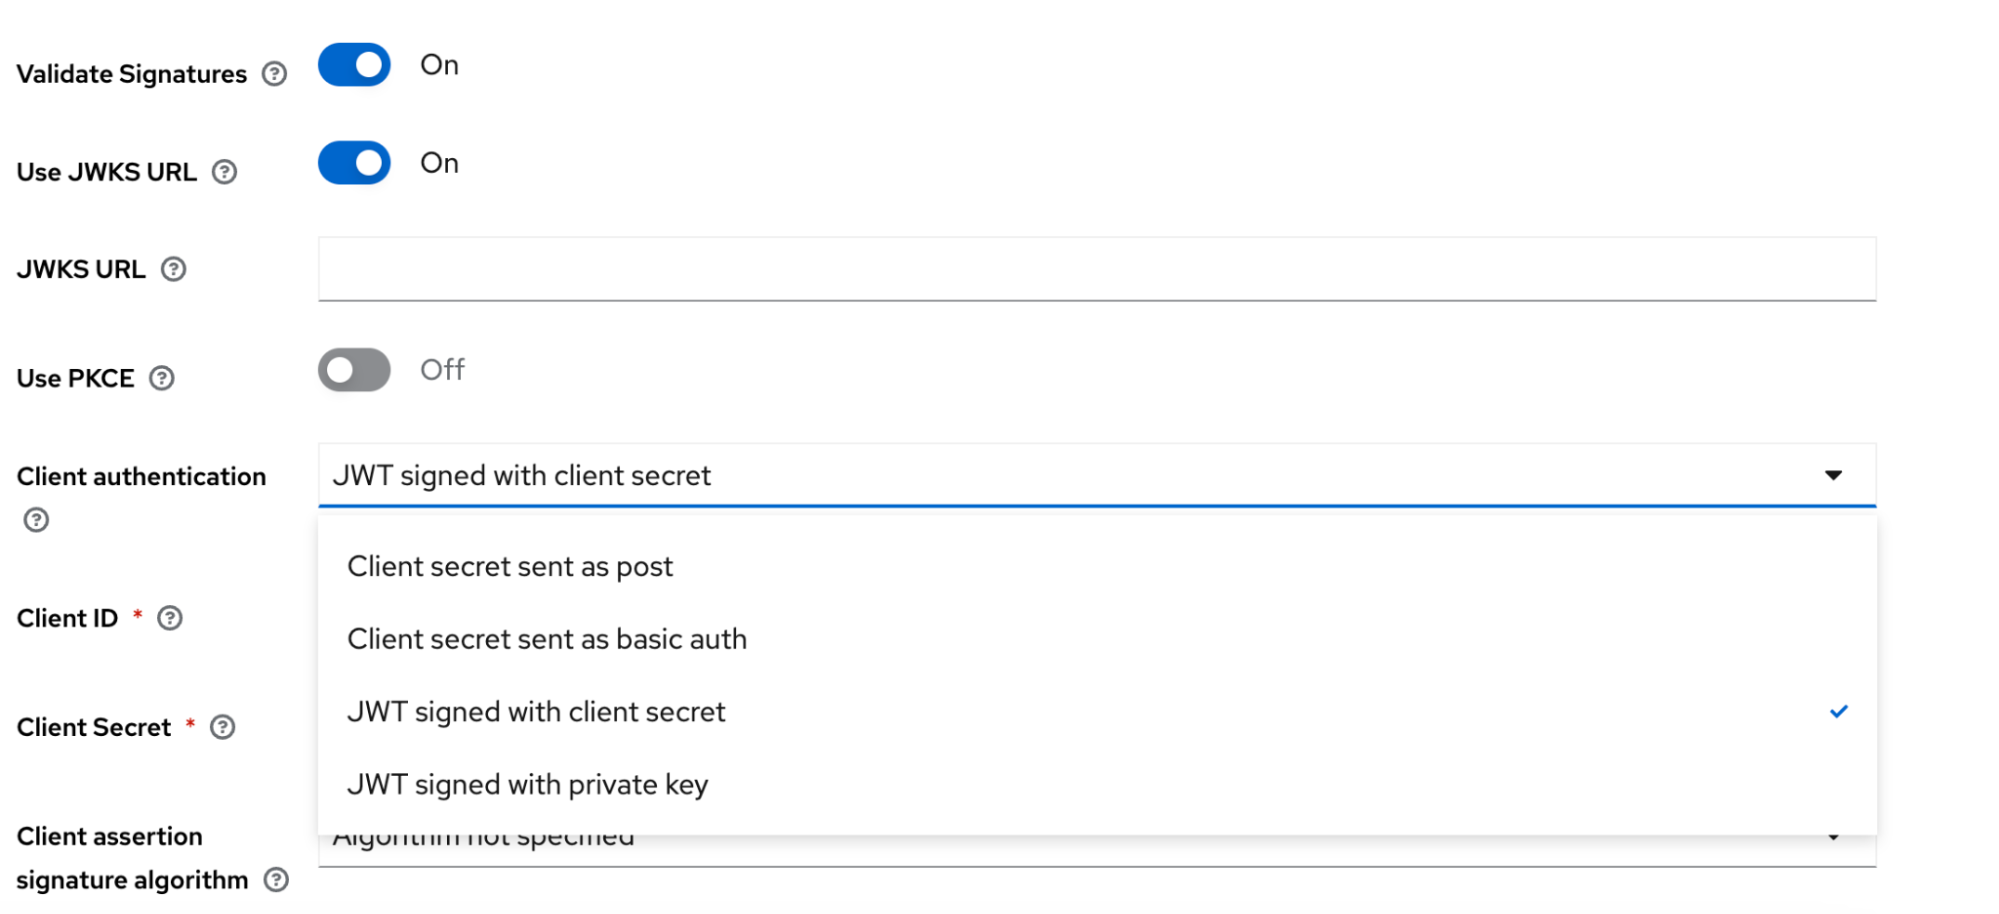
- Fill in client id, client secret and set client assertion algorithm to HS256
- Finally Click Add
-
Add Mappers
- For the users to function to correctly in DynamoAI, all users are
- Assigned some org level roles
- Part of the all users group
- The users however when you try to login into DynamoAI via your Keycloak as IDP, they won’t have those roles or be a part of that group
- This can be facilitated by Mappers in the IDP
- For the users to function to correctly in DynamoAI, all users are
-
Create the following mappers in DynamoAI’s IDP
-
role:org:dynamoeval:developer
Please fill in the following values there. This Mapper makes sure that the user when they log in for the first time, they get assigned the
org:dynamoeval:developerrole in DynamoAIThe roles can further be altered using the Organization Management Dashboard
Attribute Value Name role:org:dynamoeval:developer Mapper Type Hardcoded Role Sync Mode Override Inherit Select Role org:dynamoeval:developer 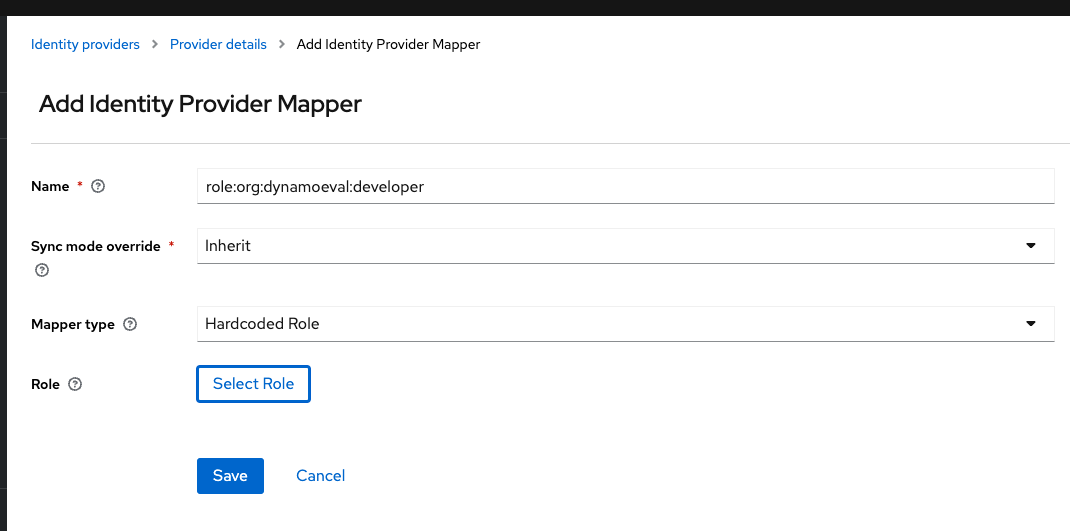
-
group:all-users
Please fill in the following values there. This Mapper makes sure that the user is added to the all users group, so that the public sharing of the resource can function
Attribute Value Name group:all-users Mapper Type Hardcoded Group Sync Mode Override Inherit Select Role all-users 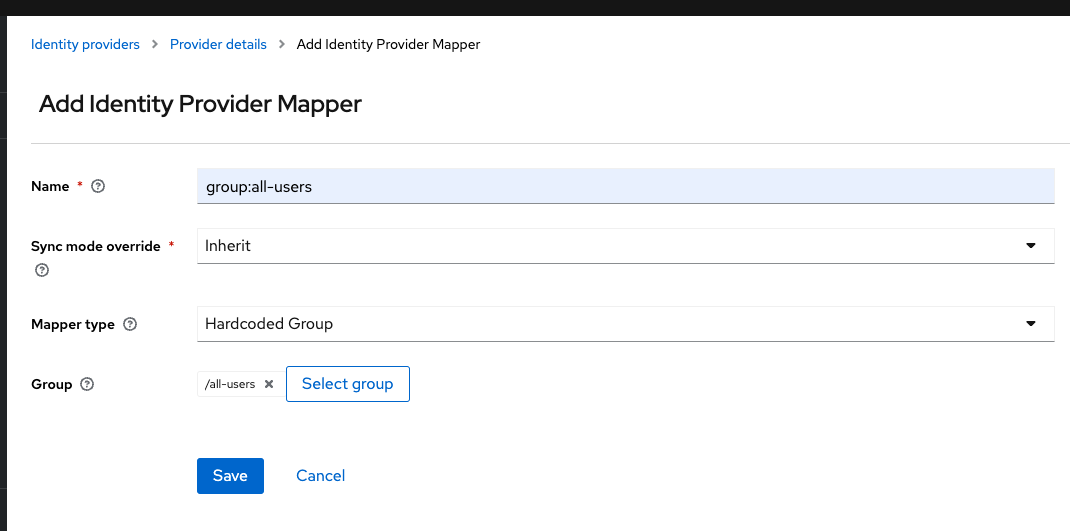
-
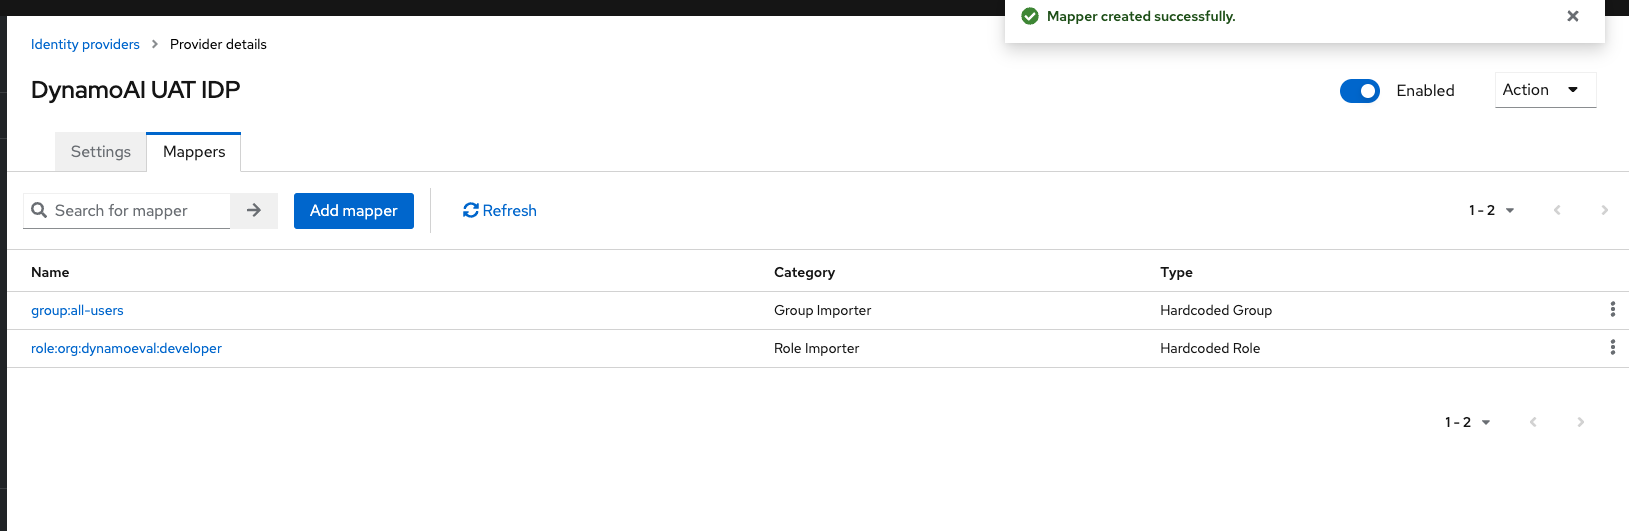
This is how the final mappers list should look like
-
Testing
-
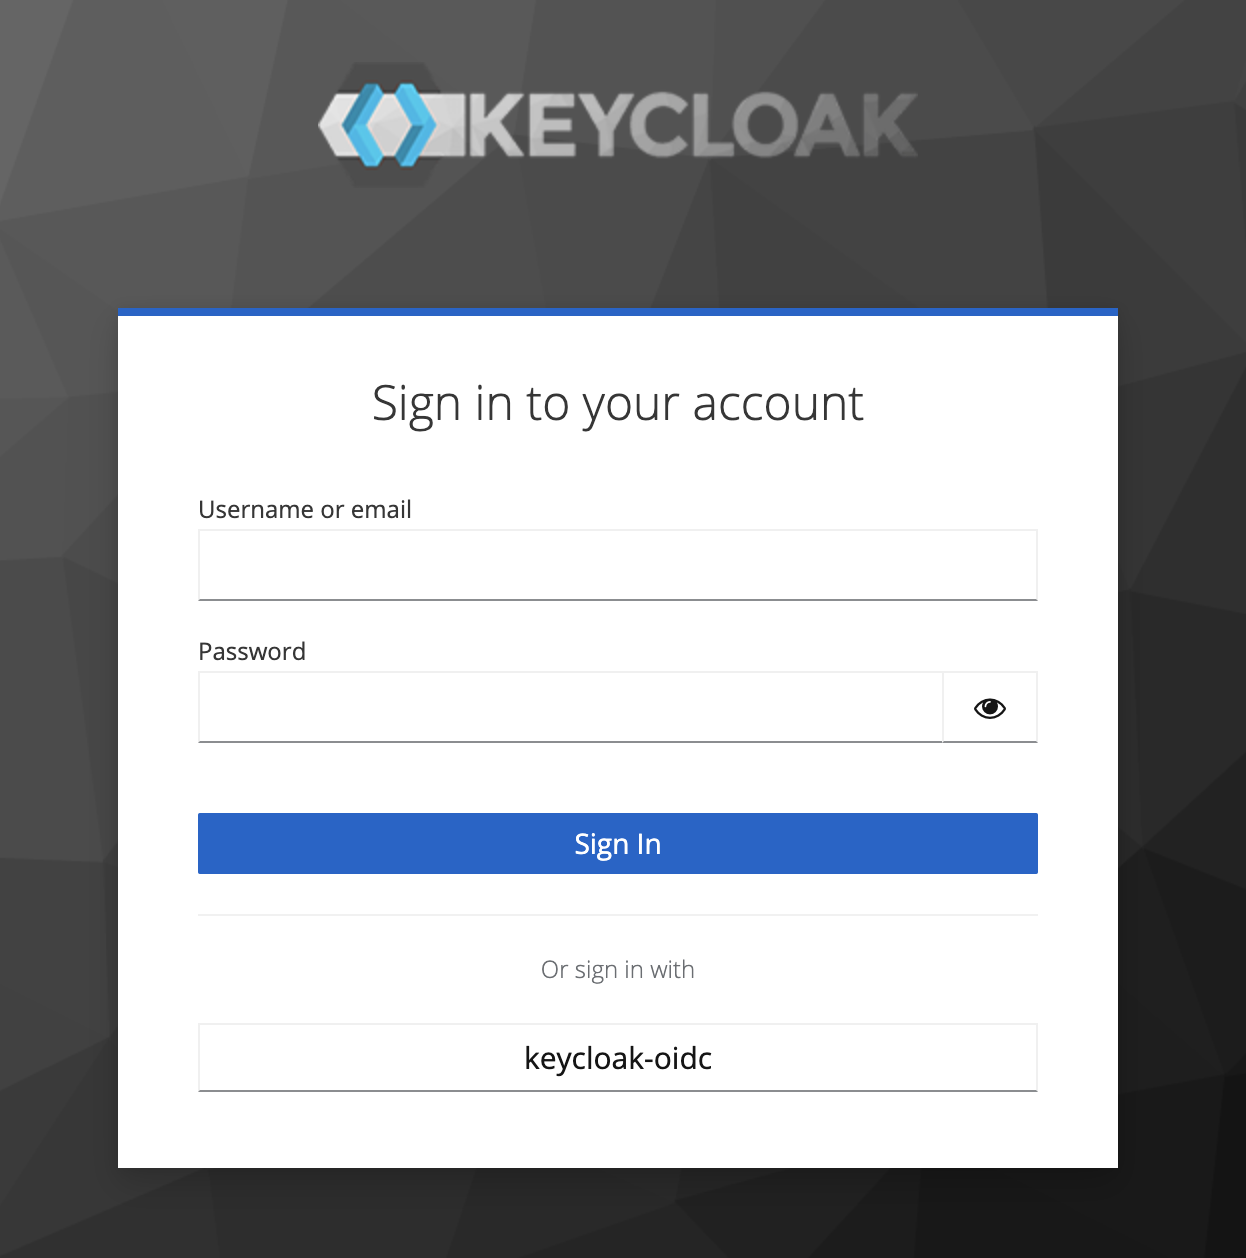
Visit LogIn Page, you should see your IdP Added
-
Click on your IdP (
kecloak-oidcin this case)It will redirect to the customer’s login page and customer’s users can now sign in.